This class teaches you how to build your first Android app. You’ll learn how to create an Android project with Android Studio and run a debuggable version of the app. You'll also learn some fundamentals of Android app design, including how to build a simple user interface and handle user input.
Before you start this class, download and install Android Studio.
This lesson teaches you to
In the previous lesson, you created an Android project that displays "Hello World." You can now run the app on a real device or an emulator.
Run on a real device
Set up your device as follows:
- Connect your device to your development machine with a USB cable. If you're developing on Windows, you might need to install the appropriate USB driver for your device. For help installing drivers, see the OEM USB Drivers document.
- Enable USB debugging on your device by going to Settings > Developer options.Note: On Android 4.2 and newer, Developer options is hidden by default. To make it available, go to Settings > About phone and tap Build number seven times. Return to the previous screen to find Developer options.
Run the app from Android Studio as follows:
- In Android Studio, click the app module in the Project window and then select Run > Run (or click Run
 in the toolbar).
 - In the Select Deployment Target window, select your device, and click OK.
Android Studio installs the app on your connected device and starts it.
That's "hello world" running on your device! To start developing, continue to the next lesson.
Run on an emulator
Before you run your app on an emulator, you need to create an Android Virtual Device (AVD) definition. An AVD definition specifies the characteristics of an Android phone, tablet, Android Wear, or Android TV device that you want to simulate in the Android Emulator.
Create an AVD Definition as follows:
- Launch the Android Virtual Device Manager by selecting Tools > Android > AVD Manager, or by clicking the AVD Manager icon
 in the toolbar.
 - In the Your Virtual Devices screen, click Create Virtual Device.
- In the Select Hardware screen, select a phone device, such as Pixel, and then click Next.
- In the System Image screen, click Download for one of the recommended system images. Agree to the terms to complete the download.
- After the download is complete, select the system image from the list and click Next.
- On the next screen, leave all the configuration settings as they are and click Finish.
- Back in the Your Virtual Devices screen, select the device you just created and click Launch this AVD in the emulator
 .
.
While the emulator starts up, close the Android Virtual Device Manager window and return to your project so you can run the app:
- Once the emulator is booted up, click the app module in the Project window and then select Run > Run (or click Run
 in the toolbar).
 - In the Select Deployment Target window, select the emulator and click OK.
Android Studio installs the app on the emulator and starts it.
That's "hello world" running on the emulator! To start developing, continue to the next lesson.


 Tecnologia 4G (Velocidades de download até 150Mbps)
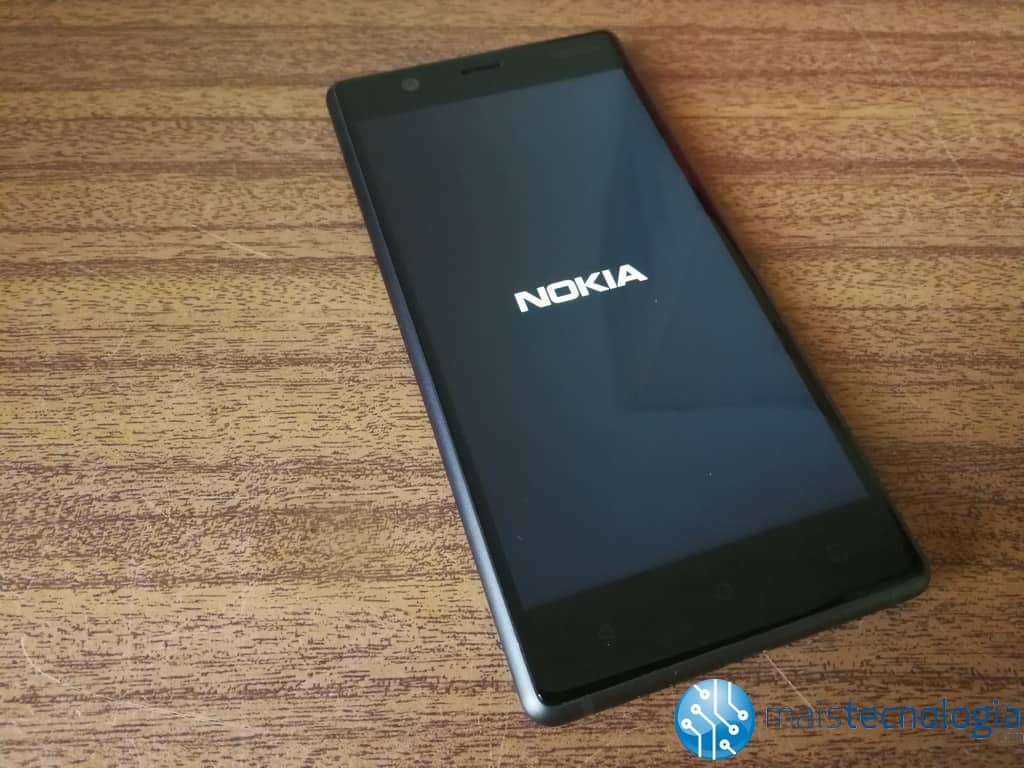
 O Nokia 3 apresenta um design interessante para o preço que pratica. Dá a ideia que temos nas mãos um telemóvel perto de um topo de gama. A traseira está construída em policarbonato e as bordas de metal dão a este equipamento um look premium, quando comparado com outros telemóveis da marca.
 Quanto ao ecrã, o equipamento conta com uma tela de 5 polegadas e com uma resolução de 720p, um pouco abaixo do esperado para um smartphone desta geração. Ainda assim apesar de não ter uma resolução Full HD, o Nokia 3 apresenta imagens nítidas e um ecrã aceitável tendo em conta a gama em que está inserido. No entanto, se a resolução e o brilho do ecrã for um ponto que valoriza muito num smartphone, aconselhamos que procure outro equipamento que se ajuste melhor às suas necessidades.
 Ambas as câmeras deste smartphone são de 8MP. Claro que não são topo de gama, mas uma vez que o telemóvel também não o é, já seria de esperar. Ainda assim, em condições de boa luminosidade, a câmara traseira é capaz de captar imagens bastante nítidas. Nas condições em que a luz não é tão boa já não se porta assim tão bem, mas possui um poderoso flash LED capaz de ajudar.


 O Nokia 3 é um telemóvel que vem equipado com uma versão recente do Android e tem um design bastante interessante, que dá a sensação que temos um telemóvel premium nas mãos. O problema é que, tal como já referimos ao longo da nossa análise, o seu desempenho não é o melhor. Não é um dispositivo muito potente e trava frequentemente quando acedemos a aplicações mais pesadas, sendo este um ponto bastante negativo neste telemóvel, uma vez que é sempre chato não conseguirmos desempenhar as nossas tarefas com o nosso smartphone. Além disso, a bateria descarrega mais rapidamente que a maioria dos equipamentos.


 O preço de 179,99€ não é baixo e os mais entendidos considerarão excessivo, mas a Tbee não foi pensada para ser uma Android Box para os geeks, mas sim facilitar a transformação do nosso sistema de entretenimento em casa a qualquer pessoa. E, sem dúvida, que isso é conseguido, permitindo a instalação das mais variadas aplicações Android, além de ainda ter, no mesmo sistema, todos os canais da box da NOS, Vodafone ou da MEO.
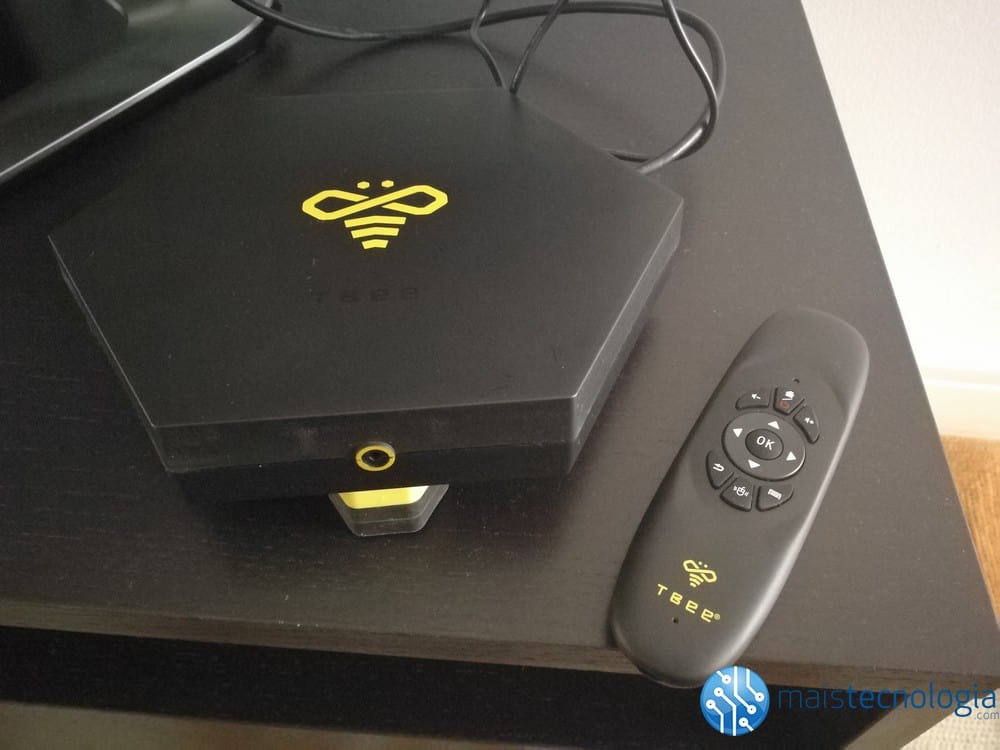
 O comando, por seu lado, é bem interessante. Pequeno, simples de usar e intuitivo, sendo que por trás tem um teclado QWERTY completo que é muito importante para pesquisar. O carregamento é feito por microUSB e pode ser feito através da própria Box, já que a mesma tem portas USB.


 Experimentámos os comandos por voz e os comandos por gestos, e se por voz tudo correu normalmente com uma excelente taxa de acerto, o mesmo não aconteceu com os comandos por gestos, já que tive alguma dificuldade para detetar a minha mão. Experimentei com boa luz e com pouca luz, mas o desempenho não foi muito bom. No final, o comando será sempre o controlo primordial num dispositivo deste tipo e quando pensamos na televisão.
 A Tbee não é uma box para os entendidos ou Geeks, mas sim para o utilizador comum ou menos à vontade com o Kodi. Com a Tbee tem uma integração total com a box de operador e uma interface intuitiva e simples para qualquer utilizador, não necessitando de muito tempo para aprender. Além disso, vem acompanhado com uma câmara e um comando com teclado, o que é muito útil.